There are several nerdy obsessions I have. (You’ve probably all noticed the Doctor Who thing by now…) But I also LOVE anything Harry Potter and I have a passion for all things Walking Dead. So, after the last HodgePodge Crochet gift exchange–when my crossbow toting Walking Dead mug was gifted to me by the same dear friend who sent me all of that handspun Exploding TARDIS yarn--I knew I wanted to turn things up a notch by creating something nerdy to rest it on.


What goes better with a Team Daryl Walking Dead mug than Harry Potter?!? It works in my head… Off to Pinterest I went in search of how to make this a reality! I found an amazing How To over on brightnest. Using a few cheap supplies and some DIY magic, she came up with three gorgeous ways to make coasters that reflect your personal style.
Still, I wanted something a little more…geektastic…so I decided to build on her idea and make my inner nerd happy!
 I started with the cork. For my project I used cork tiles. You can find these pretty much anywhere. They come in a pack of 4 and are perfect for cutting and are also flat (which is important if you’re making a coaster) but you can also use the rolled cork too if that’s what you have lying around. Just unroll it a day before you plan to use it and place it flat under something heavy (like a stack of books) so you can work with it a little easier.
You will also need a ruler, a pencil, a sharp scissor or X-Acto knife, an acrylic sealer like Mod Podge, a paintbrush, cardboard, hot glue sticks and a glue gun or e6000, a printer, and images of whatever it is you want to turn into a coaster! Optional extras are things like acrylic paint (to age your coasters), yarn (to decorate the edges), and rubber sealer (to protect the cork from drying out and to provide some grip so your coasters don’t go sliding around on you.)
The first thing I did was to cut coaster sized squares of both cardboard and cork. The beauty of this project is that you don’t have to do it with traditional square or circle shapes and you don’t have to stick with the standard coaster size. Make them smaller for impromptu tea parties or larger for oversized mugs. Make them oval or hexagonal or go with a rhombus if you’re feeling particularly geeky.
Since I wanted to put several Harry Potter chapter titles on my coasters, I went with a standard 4″ x 4″ square.
I sandwiched together my cardboard and cork and glued them together with my hot glue gun. Cardboard LOVES hot glue so this part of the project went super quick. Once I’d gotten all four of my coasters glued together, I printed out the chapter headings I wanted as coasters, cut my images to fit, and then took my time painting some Mod Podge on the cardboard, arranging the image on top, and painting on more Mod Podge to secure. GO SLOW so you don’t get any air bubbles and keep smoothing until your image is how you want it.

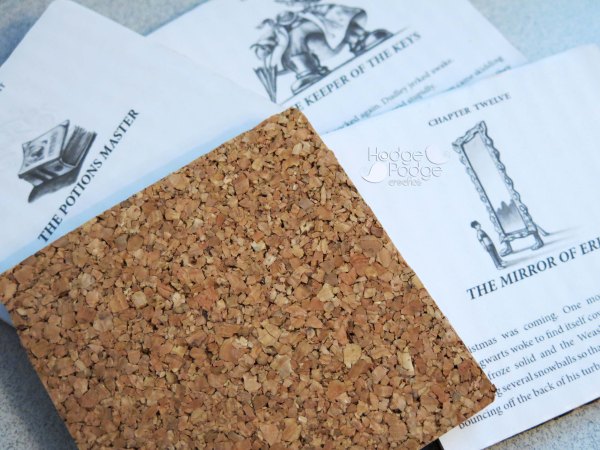
I know people are going to ask me where I got my images from and the answer is from the book! I own all of the Harry Potter books as digital copies so it’s pretty simple to take the digital image and create a printable graphic to use in a project like this one. In order to create a printable of your favorite chapters–in Harry Potter or any book that you love–all you have to do is follow these simple steps:
If you’re on a PC, pull up the page you want to copy and hit the Prtsc button on your keyboard. (Nothing will happen so don’t panic.) Then open your favorite graphics program and paste the image into it. Crop until you are happy, save the image, open a word doc and insert the image. Adjust the image so it is the correct size and print!
If you’re on a Mac, pull up the page you want to copy and hit Command+Shift+4. This brings up a selection box so you can specify an area to take a screenshot of, then save it as a file to the desktop. Open your word alternative (like OpenOffice) and insert your image. Adjust the image so it is the correct size and print!
If you own a physical copy of the book you can always scan your pages into your computer and use that as well. Save your image and follow the steps above to adjust and print!
Once you finish sealing them with several coats of Mod Podge and they’re dry, you’re pretty much done. I wanted to age mine so I broke out the acrylic paints and got to work. I thinned some brown and yellow with water and used a paper towel to gently rub them in. Because the coasters were sealed, I got some lovely results!

 Once they were dry, I covered them one more time with Mod Podge and then sprayed the cork backing with some aerosol rubber. This step is optional but I find that it helps protect the cork from drying out and also gives your coasters a little grip so they don’t move around too much on you.
After a few coats, you’re ready to use your new coasters!
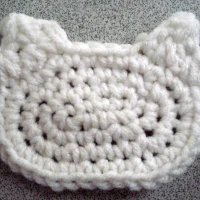
You can opt to wrap them in a little fun fur (because who among us isn’t a little nerdy for yarn)…..

and all that’s left is to pull up your favorite pattern on your computer, grab some yarn and a hook, top your coaster with your favorite mug and hot beverage, and enjoy!




 Once they were dry, I covered them one more time with Mod Podge and then sprayed the cork backing with some aerosol rubber. This step is optional but I find that it helps protect the cork from drying out and also gives your coasters a little grip so they don’t move around too much on you.


