Gift exchanges are always a lot of fun for me and in a recent one, a very dear friend of mine sent me a box loaded with delicious goodies. One of those goodies was this gorgeous hank of yarn that she hand spun herself just for me!
This beauty was purchased as roving from AJ’s Handmade Creations and is called ‘Exploding TARDIS’. 

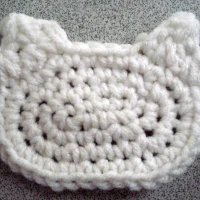
Free Me!
Anyone who has spent any time hanging around this blog knows I have a weakness for The Doctor–he’s been lovingly recreated in both purses and tees which I use constantly–so this yarn holds a special place in my heart!
I was afraid to touch it though! If you’ve ever gotten your hands on any handspun, hand-dyed yarn that cost a small fortune, you know the panic that sets in when you think about using it. Generally I wrap all that beauty into plastic and squirrel it away…
But I was determined not to let anything TARDIS get buried under the weight of my yarn hoard, so the battle between making something amazing or making a complete and total mess of my gorgeous and expensive yarn began!

I decided that the project that I wanted to tackle had to be practical and had to be something that I would use in my everyday world. Then, while settling into the current book of the HodgePodge Crochet: The Community’s Book Club event (which happens to be The Maze Runner), I knew what I wanted to use that lovely yarn for. A Kindle cover!
It seemed simple enough but I didn’t know the first thing about working with handspun wool. So I did what I normally do whenever I want to figure stuff out…I started playing with it!
The first thing I did was to carefully roll the yarn from the hank into a workable ball. My cat seemed completely unimpressed when I’d finished.

After I’d finished that I decided that a bigger hook would probably be better in the long run so I grabbed a Doctor (also gifts from another gift exchange!) and got to work!
Knowing what little I did about the whole felting process, I jumped right in and didn’t worry too much about tension or making neat stitches and, after eyeballing the size, I took a deep breath, hoped for the best, and chained 22!
I used a single crochet stitch, working in the round, and followed the basic rules you would find when starting most baby shoe soles–meaning you chain an amount, sc in the 2nd chain from the hook and in each ch across to the last ch, 3 sc in the last ch, rotate your work so that you can crochet into the bottom of the foundation chain, sc in each ch to the last, 2 sc in the last ch.
Then I just single crocheted around and around and around until my Kindle pouch was about 2 inches taller than my Kindle. When I finished I was a lot upset…not gonna lie. What I’d produced was an oversized pocket thing that looked lumpy and uneven. The color was amazing but it really was not something you ever expect to see when you finish a project. Without the beautiful symmetry of crochet in regular yarn to fall back on I was left with nothing BUT the color. The color part, I learned, would be very important to the finished project and in hindsight, I should have been paying more attention to it.
But instead I panicked…

I was so freaked out that I didn’t even take a photo because I was convinced that I’d ruined all my expensive and delicious yarn.
I took a small break to check on a pattern I have currently being tested (if you want to check out the progress, head on over to the HodgePodge Crochet facebook page to see the sneak peaks!) and since that was going so well I decided that things couldn’t get any worse with my sleeve thing–I wasn’t about to throw it away…and forget about frogging it–so I did what any crocheter in my situation would. I soldiered on!
I threw the Kindle cover into a bath of white vinegar and cold water to keep the colors from running as much as possible and let it soak for 20 minutes. I don’t have any pics of that process either because I was positive I would be rocking in a corner at the end of this whole felting procedure mourning the loss of my beautiful yarn…
Quick tip: If you try felting your yarn and you’ve used either a variegated yarn like my Exploding TARDIS or you’ve used more than one color, it’s a good idea to soak your yarn first in a white vinegar/cold water bath to set your colors as much as possible before starting the felting process. I recommend about 1/2 gallon of COLD water with 1/2 cup white vinegar. You can add more vinegar if you’d like and it won’t hurt your wool. Resist the temptation to rush this process!! Let the vinegar do its thing and you won’t be crying over ruined yarn when you’re done!
When your yarn is done soaking, drain the water/vinegar mix and gently press the water out of your yarn. DON’T WRING!! Then fill your bowl or bucket up with HOT water. As hot as you can comfortably stand it. Place your project into the hot water and gently agitate so that your project now is filled with the hot water instead of the cold.
Next it’s time to take the whole thing to your laundry room!
To felt wool you have two options. One is to do it by hand…which is time consuming and hard. The other is to use your washing machine. If you choose to use your machine, there is a catch. It has to be a top loading one. Front loading machines won’t give you enough agitation to properly felt.
I’m only going to talk about the process that I did, which is using my machine to do all the work, but if you’d rather tackle this process by hand it’s pretty much the same process except your hands take the place of the agitator in your machine.
 The first thing you want to do is fill your washer with the hottest water you can. Hot water is key here. I added detergent…which was a HUGE mistake. I don’t recommend adding detergent because I had to run my project through several cycles just to wash out the residual soap…and I only used a tiny bit!
Skip the detergent and just use super hot water and baking soda instead. Baking soda won’t foam and will help the felting process just like detergent will without having to worry about lingering suds.
Once your hot water is in, toss in your baking soda and a few towels or a pair of jeans along with your project and let it agitate for about 10 minutes. The waiting process is terrible but totally worth it!
After 10 minutes, take out your project and gently squeeze the water from it. Again, don’t wring!
Your project should have gotten smaller and much fuzzier. If you can still see your stitches, throw it back into the machine and keep checking it every 5 minutes until it’s completely fuzzy (it should look like felt).

When you’re happy (and you know it) clap your… Uh, no..that’s not right.
When you’re satisfied with your felting genius and your project looks perfect, (by perfect I mean a shrunken version of itself that’s all misshapen and furry) it’s time to lock those fibers in place with a rinse. Most machines use cool water to rinse and that’s important here because cool water will lock all that hard work into place. A quick spin to remove most of the water and you’re ready to block your new masterpiece into its forever shape!
While your project is still wet, make sure you take time to pull it into the shape you want it to be when dry! If you don’t, it will stay whatever shape it is when it’s dry…FOREVER. There is no going back. This step is one you want to take your time with and not rush. Pull, push, stuff, pin…do whatever it is you need to in order to make sure that your finished result will be something that looks like what you envision in your head!
Leave your work to air dry, which might take a while so be patient! Once you’re finished, you should have something to be proud of!

I hope you are inspired to pull out some of your expensive handspun hanks of yarn (that I know you have squirreled away somewhere in a closet or in your stash) and give felting a try! It really is a lot of fun and when you’re finished you will have something beautiful that you can finally get some use out of!!

If you’ve taken the challenge and have felted something after reading this, I’d LOVE to see it! Head on over to my facebook page to share your photos and to tell me all about your project!


 I get asked a lot of interesting questions about crochet and today a really great one came my way that I thought would be perfect to share right here on the blog!