
…..because crochet is what you live for.
ADORABLE Hoppy Bunny Appliques have sprung to life just in time for spring!
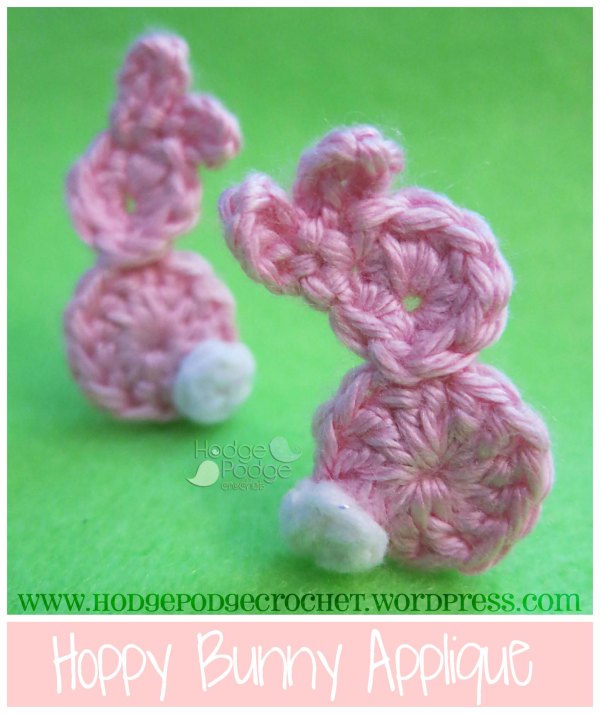
I love this cute little bunny and you can find your FREE copy over in my Craftsy or Ravelry shops! The pattern comes complete with instructions on how to create a left OR right facing rabbit.
Use yours to embellish hats, slippers, scarves, sweaters, wristers (you can stitch these little cuties onto anything!) or get creative and create some super cute springtime jewelry that is sure to be a hit as quick class gifts or birthday party favors!


I am SO happy to be part of the Worldwide Artist Blog Hop!! For those of you who don’t know what that is, think GLOBAL DOMINATION!!

Okay…maybe it’s not that extreme, but it’s kind of a way to thread together super crafty artist types through their blogs with a series of questions and answers. If you are curious about other artists who have contributed, a quick Google search of ‘Worldwide Artist Blog Hop’ will yield enough results to keep you happily entertained for weeks!
I was nominated by Crystal from Crystalized Designs to participate and a bit later, I’ll be nominating three others to join in the fun! Crystal’s AMAZING blog can be found by clicking the following link! http://www.crystalized-designs.com/blog/
So the way this works is for each nominated blogger to answer 4 simple questions about themselves and then nominate 2 or 3 other bloggers (You’ll find my nominations at the tail end of this post and I promise that you’ll find some amazing content over in their blogs I link!!)
Onward to the questions!
I do what I do because I honestly LOVE it. My mind is always thinking about new ideas—and not always of the yarny variety—to try. My inquisitive nature is to blame for things like DIY glow in the dark yarn, DIY paper mache yarn bowls, and the crochet Indian cross stitch.
I’m sure if you’ve spent any amount of time looking through my blog you will realize that I’m not all about the yarn! I really love anything arts and crafty and I enjoy getting my fingers dirty to experiment and then share my experiments with all of you!
I think my work is different because it’s unpredictable. Most other crocheters are stressing out over deadlines and creating the next big thing while I’m over here going with the flow and taking my time to enjoy the entire process.
I tend to crochet what I’m in the mood to crochet and let that guide me. I trust that whatever I’m doing is the thing I’m supposed to be doing and that it’s also the right time for it to get done.
I also don’t have a set style. I could be into highly textured crochet one month and thin sock yarn the next. If you look through my patterns you will see that reflected in them.
This is a REALLY hard question to answer because I don’t have a process. Creativity just happens and I let it…I suppose that could be considered a process but I’m totally organic and generally have a, ‘whatever gets done is what’s supposed to get done’ outlook on life.
At this moment in time I have just finished a shrug pattern for the first ever HodgePodge (The Facebook Community) Shrug Showdown! I can’t wait to share it with you all because it was a MONSTER of a pattern to write—it will be offered in sizes from 6 months to an adult XL—and an even bigger monster to get tested, but I’m super happy with the outcome and I hope you’ll all love it as much as I do!
I’ve also recently wrapped a project that is slated to be included in the November issue of The Pattern Pack, put out by Happily Hooked Magazine! You can find this amazing digital mag right here: http://www.happilyhooked.com/ and I will be sure to update with links to my contribution as soon as I have it!
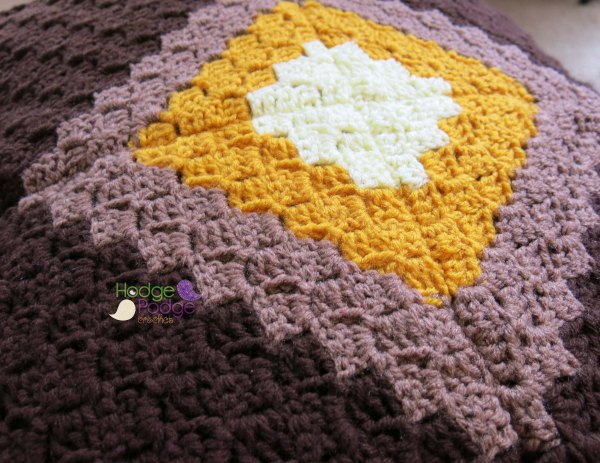
In my downtime I’ve decided to tackle the Double Take Pillow, designed by Delma Myers and published by Red Heart Yarn. So far I’m in love with the simplicity and with the fact that it’s a fast working pattern! At the rate I’m going, I’ll have all four pillows covered in a week!

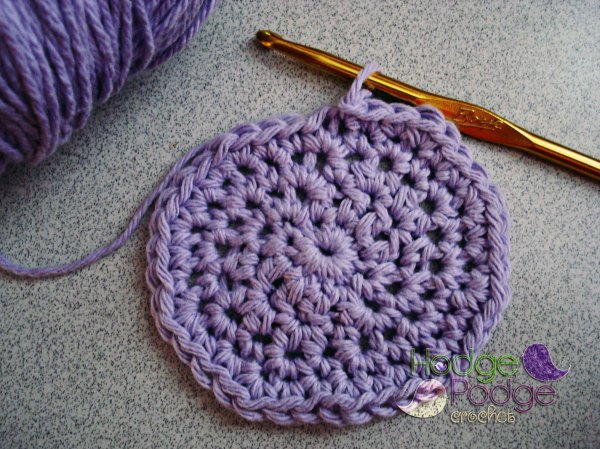
I’ve also recently wrapped my second granny square exchange hosted by ShopKimberlie. I LOVE her exchanges because everyone involved is amazing and I always have so much fun seeing what everyone comes up with. As soon as my squares come back I will have 80 of them to assemble (aren’t you all jealous?!?) These are the granny wheel squares I sent out! (The free pattern can be found on the minspiration blog by following this link: http://minspiration.blogspot.com/2010/04/granny-wheel-square.html )

I’m also continuing the exploration of the Kreinik yarn that was a recent addition to my stash! More to come on that very soon!

Also, on a more personal note, if you’ve been following the HodgePodge Facebook page you know that our family was recently adopted by two of the most adorable kitties!! We call them Midnight and Chaser and they probably call us, ‘Those people who feed us and keep us warm.’

I’d like to nominate:
Jacqualine Calderon of http://crochetcouture.net/
Michelle Warwick of http://fromhomecrochet.com/
and
Cassidy Frazee of https://wideawakebutdreaming.wordpress.com/
All of these blogs are run by amazing women and are FULL of incredible content that you don’t want to miss!!

Mickey Mouse Inspired Cup Cozy :: Free Pattern by Jacqualine Calderon of Crochet Couture

Holly and Berries :: Free Crochet Pattern from Michelle Warwick of From Home

Her Demonic Majesty by Cassidy Frazee
Head on over to bookmark and don’t forget to leave them a comment once they post their own blog hop!
If you enjoyed learning more about me I’d love to hear from you in a comment below! (Comments are moderated and will be approved if this is your first time.) Once again, thanks to all of you who make HodgePodge what it is today because crochet is so much better when you do it with friends ❤
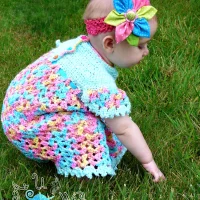
I love appliques. They are always adorable and add the perfect accent to whatever project you are working on. When I think ‘applique’, flowers typically spring to mind–but today we’re going to explore a different take and create a cute owl face!
This applique would look adorable stitched onto a hat or a blanket, a sweater or a purse! The possibilities are endless.
This owl applique is a lovely finishing accent to the Baby’s Best Bumpy Blanket!
Materials Needed:
Stitches Used:
Using your chosen center color, begin with a magic ring. Ch 1 (does not count as sc). Work 10 sc in center. Pull ring closed. DO NOT join.
Rnd 1: 2 sc in the 1st sc, 1 dc in next 4 sc, 2 sc in next sc, 1 dc in next 4 sc. (12 sts)
Rnd 2: 2 sc in next 2 sts, 1 hdc in next st, 2 hdc in each of the next 2 sts, 1 hdc in next st, 2 sc in next 2 sts, 1 hdc in each of the next st, 2 hdc in next 2 sts, 1 hdc in next st. (20 sts)
Rnd 3: [2 sc in next st, 1 sc in next st] 10 times. (30 sc)
Rnd 4: [2 sc in next st, 1 sc in the next 2 sts] 10 times. Sl st in the next st and finish off. (40 sc)
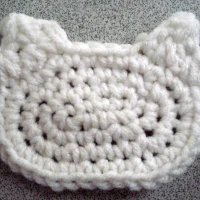
Change color to your outline color.
Note: This part is important to get correct because it will affect how your project looks when you are finished!
Join your new color with a sl st in the stitch directly in front of the one you finished off in the last round.
Ch 1 (does not count as a sc), 1 sc in same space as join. 1 sc in next 2 sts, picot (ch 4, slip stitch in 1st ch)–ear made.
1 sc in next 2 sts, 2 sc in next st, [1 sc in next 4 sts, 2 sc in next st] twice, 1 sc in next 2 sts, picot (ch 4, slip stitch in 1st ch)–ear made.
1 sc in next 2 sts, 2 sc in next st, 1 sc in next 4 sts, [2 sc in next st, 1 sc in next 4 sts] 3 times, join with a sl st in the beginning sc. Finish off. (47 sts)

Change color to your border color.
Note: This part is also important to get correct because it will affect how your project looks when you are finished!
Sl st with your new color into the 1st st directly behind the first picot you made in the last round. (You will begin your crochet working around that first picot).
Ear: Ch 1 (does not count as sc), sc in join, sc in 1st chain (this is the first chain that makes up the picot), (sc, ch 1, sc) in st at top of picot, sc in next ch, sc in next st on head (this is the last st that was slip stitched into for the picot in the round before.) Ear complete.
Top of head: 1 sc in next 8 sts, l sc in next st, 1 long sc in next (insert the hook into the next stitch two rounds below, yarn over, pull up a long loop, yarn over, pull through 2 loops on hook–long sc made), 1 sc in next 8 sts–top of head complete.
Ear: sc in 1st chain (this is the first chain that makes up the picot), (sc, ch 1, sc) in st at top of picot, sc in next ch, sc in next st on head (this is the last st that was slip stitched into for the picot in the round before.) Ear complete.
Bottom of head: 1 sc in each st around. Join with a sl st in the beginning sc. Finish off and weave in all ends. (56 sts)

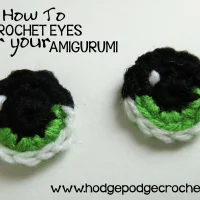
All that is left are the eyes and beak!
Eyes (make 2 of each color)
With white, ch 3. 10 dc in 1st ch. Join with a sl st to top of first dc. Finish off leaving a long tail for sewing.
With black, ch 2. 6 sc in 1st ch. Join with a sl st to the top of first sc. Finish off leaving a long tail for sewing.
Beak
With yellow, ch 6. Turn.
Row 1: 1 sc in 2nd ch from hk, 1 sc in each ch across, ch 1, turn. (5 sc)
Row 2: Sk 1st sc, [sc2tog] twice, ch 1, turn. (2 sc)
Row 3: sc2tog, finish off leaving a long tail for sewing.

Assembly
Arrange your eyes and beak and sew as shown in the picture using your tails.

I hope you’ve enjoyed this cute little project. If you’ve made one and want to show your stuff, mosey on over to HodgePodge on facebook and post a pic!
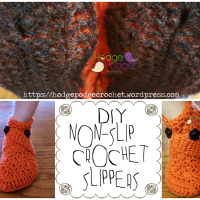
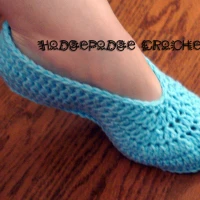
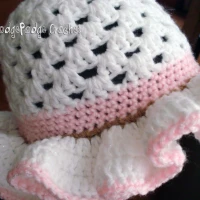
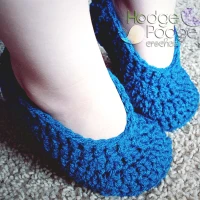
I get a lot of questions about what to do with the top of a baby bootie. I shy away from suggestions because I’m all about creativity and doing what makes you happy. But there’s a simple rule of thumb I always use when tackling a decoration–and that’s scale.
It’s important to keep in mind that when you’re dealing with tiny baby booties, you need to scale everything that goes on top WAY down so that it will be in proportion with the overall shoe.

Several small flowers clustered together or one large flower in the center is always stunning.

Small appliques and even tiny stuffed animal heads are ADORABLE! Really, your imagination is the only limit when it comes to how a plain pair of booties are decorated.
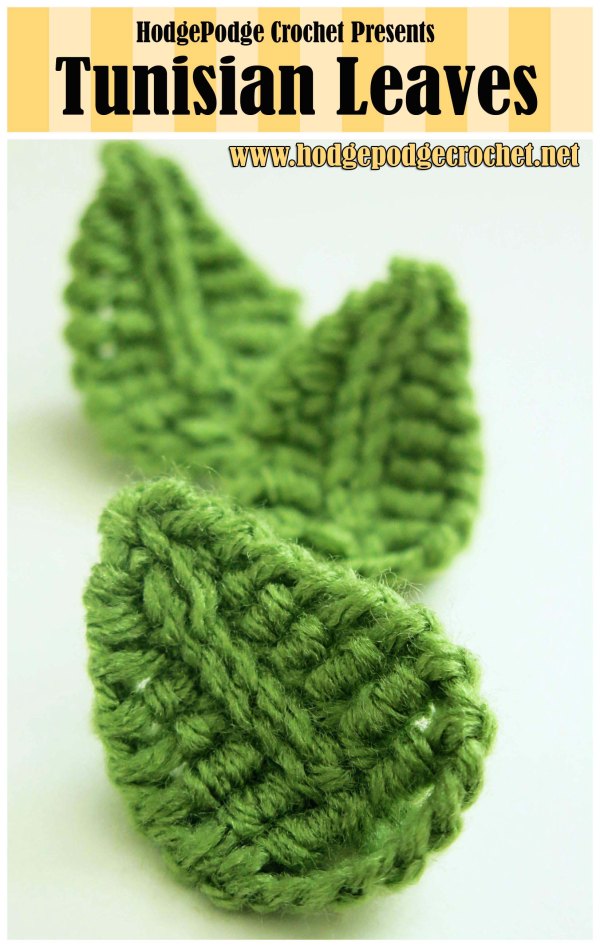
Today I’m going to give you a pattern for a simple leaf to use under small flowers for the tops of baby booties.
We’ll start with the single leaf.

Little Leaves (Single Leaf)
Materials Needed:
Note: Leaf will be worked on both sides of the foundation chain (top and bottom). DO NOT turn your work.
Stitches Used:
Ch 5
Sc in first ch from hook, hdc in next ch, dc in next ch, 3 sc in last ch. ROTATE your leaf so you can work the underside of your foundation ch.
Dc in next ch, hdc in next ch, sc in next ch, sl st in the top and finish off. Weave in tails and sew to your project with a length of the same color green yarn.
Finished leaf using a D hook measures approximately 1 inch (2.5 cm).
The second way to tackle leaves is to crochet them both together. Not only does making two leaves combined into one piece save time, it’s easier on your hands when it comes time to sew them on the bootie.

Little Leaves (Double Leaf)
Materials Needed:
Note: Leaf will be worked on both sides of the foundation chain (top and bottom). DO NOT turn your work.
Stitches Used:
Ch 11
Sc in first ch from hook, hdc in next ch, dc in next ch, sc in next ch, sl st in next two chs, sc in next ch, hdc in next ch, dc in next ch, [2 sc, ch 1, 2 sc] in last ch. ROTATE your leaf so you can work the underside of your foundation ch.
Dc in next ch, hdc in next ch, sc in next ch, sl st in next two chs, sc in next ch, dc in next ch, hdc in next ch, [2 sc, ch 1, sc] in last ch, join in top on 1st sc and finish off. Weave in tails and sew to your project with a length of the same color green yarn.
Finished leaf using a D hook measures approximately 2 inches (5 cm).


Juniper Bay Skirt eBook: On Sale Now!


<div align="center"><a href="https://hodgepodgecrochet.wordpress.com/" title="HodgePodge Crochet" target="_blank"><img src="http://i4.photobucket.com/albums/y134/bushihat/button200x200_zps647f5e94.jpg" alt="HodgePodge Crochet" style="border:none;" /></a></div>
