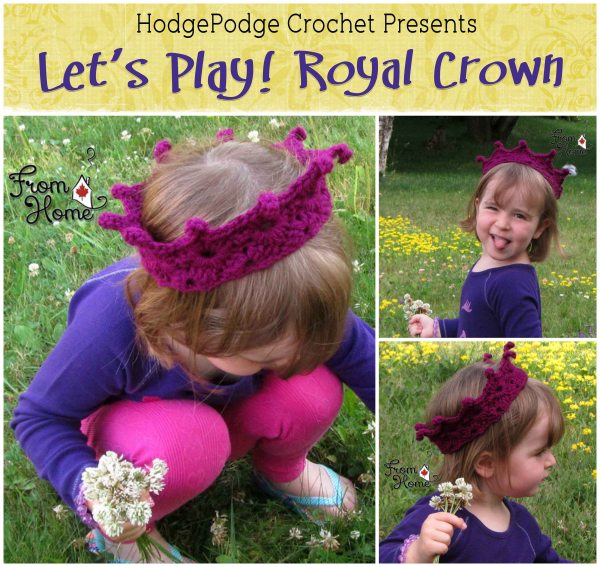
Do you have a prince or princess in your life that needs a crown?? Now you can crochet one and save the kingdom!!
Grab a hook, some yarn, your FREE copy of the Let’s Play! Royal Crown pattern, and come crochet with me! Find the links to download and the YouTube tutorial on the HodgePodge Crochet website! http://hodgepodgecrochet.net/2015/07/lets-play-royal-crown/
I’m so thrilled to announce that HodgePodge Crochet is taking part this week in a Design Wars Challenge!!
My design is going head-to-head with another design by the AMAZING Glamour4You!! Both of us are using Red Heart Boutique Silk Sari yarn in our designs, which imparts a bit of the Far East into anything you crochet.
The yarn comes in gorgeous colors and each hank is hand spun from actual silk sari fabric. Hanks are approximately 75 yds for a 3.5 oz weight. That might seem like it’s on the skimpy side but trust me; you don’t need a ton of this yarn to show it off as the star of the show because it’s dense and gets heavier and heavier as you add more in! 75 yards is more than enough for using it as an accent that’ll give your projects a huge wow factor or when using it in any super lacy projects like a shawl or lapghan.
Red Heart Silk Sari is perfect for anything home decor or accessory. (Think bag, brooch, belt, headband, etc.) I think of it more as a decorator yarn and would tend to skip using it in any projects that will be placed directly on bare skin because it’s not soft or smooth and might itch or irritate. It also has minimal stretch (perfect for purse handles!!) and the fuzzy thick and thin style texture of the yarn looks beautiful in any stitch you decide to use.
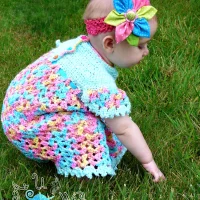
For my Design Wars entry I decided to make something fun that can be shown off poolside or thrown over a plain outfit to revel in the sunny days of summer (or brighten the long, cold days of winter!)
All of my testers had a ball with the simple construction and their little models were thrilled with the final result! Introducing: The Silk Sari Coverup!
I hope you guys love my design as much as I do and will take a minute to head on over to Design Wars to see what Ann of Glamour4You has come up with (her designs are always fun and drool-worthy!) and then vote for your favorite!!
Don’t forget to run on over to the HodgePodge Crochet Ravelry Store to find some cool summer savings on these other great Fun-in-the-Sun patterns! Use code DWSALE for 20% off!!
I’m SUPER excited to share with all of you my latest video tutorial update for the Cowboy Boot pattern! If you’d like to crochet with me, head on over to my Craftsy or Ravelry shops to download your FREE copy of this pattern and let’s get started!!
A little over three years ago I started up this tiny little blog with my first ever pattern, the Diamond Pattern Hat. I struggled FOREVER trying to help people who messaged me in facebook or emailed me understand how it was constructed and then decided that it would probably be better to put all that information up in a spot where everyone could just come to and find it on their own. I carefully edited a series of photographs and also recorded a very primitive film (done with an old Sony Cybershot balanced precariously on top of an oatmeal container…) and, for the most part, people seemed to appreciate the effort.
It’s the feedback I got from that very first post which inspired me and encouraged me to continue doing what I found that I really loved to do, and that’s to sit down and share what I love with all of you!
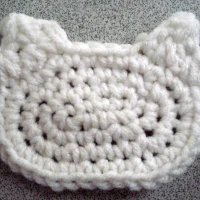
So today we’re going back to those humble beginnings as we revamp the diamond pattern hat into…A Girl’s Best Friend!
I’ve revamped the original video to this hat to put all of the parts into one cohesive tutorial and have streamlined it so that the important sections are shown without any distractions (such as background chatter or lots of unnecessary words).
If you want to get crocheting, grab some yarn and hit that play button below!
If you’re interested in snagging a FREE copy of the pattern (which I highly recommend before starting), you’re in luck! All you have to do is swing by my Craftsy or Ravelry shops to download it!
Also, if you haven’t already clicked that FOLLOW HODGEPODGE button on the side of your screen, don’t forget to do it before you leave! You don’t want to miss out on upcoming freebies and fun!
Have you ever made that PERFECT hat for your kid that you absolutely fall in love with? The fit is amazing, the length is just perfect, and the project was just challenging enough to be adorable but not something you really want to repeat because it was a pain the first time. (We’ve all been there, right?!?!)
I’ve made several hats over the years for my kids that fit the above scenario. The SINGLE BIGGEST problem I always run into is that those hats I love so much only last for one winter. Why?
Well, it’s because when I dig them out to try them on when the winter season rolls back around, they all tend to look like this…
I swear this covered her ears last year…
So what can you do when you REALLY don’t want to crochet a whole new hat in a longer size? The answer lies is a simple Single Crochet Ribbing!
The first thing you want to do is to pull out the hat you want to lengthen and measure it across the brim. Once you know that measurement, you want to measure the length and figure out how much more you want to add to that.
For my hat I ended up with a width of 10″ and a length of 7.5″. I decided I wanted to add an inch to the bottom so I crocheted my ribbing to measure 2″ wide.
For me, that meant using a J hook and chaining 10.
Because you will be folding your ribbing you want to make it twice as wide as you need, so keep that in mind moving forward!
If you don’t know how to make a ribbing, the first thing you need to do is watch this short tutorial. If you have this part down, skip to the pattern below the video!
The basic pattern is pretty simple.
Chain any number of stitches.
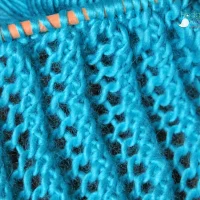
Row 1 (Right Side): Single Crochet in 2nd chain from hook and in each chain across, turn.
Row 2: Chain 1, Single Crochet in Back Loop Only in each single crochet across, turn.
Repeat row 2 to desired length.
For this project you will need to crochet your ribbing to within a 1/2″ of the width of your brim. That means it needs to be SMALLER by half an inch.
Why smaller? We need to make it smaller because the ribbing has a ton of stretch. If you made it the same width or wider, the hat might ripple out and the cold would get in…pretty much making the hat useless against the winter weather!
Now, a small note before we move on. My hat is finished with a reverse single crochet but this technique will work on pretty much any type of hat. You can even use it on store-bought knit hats!
Now that you have your ribbing the correct length and crocheted together to create a large circle, you are ready to fold it and stitch it together!
In order to do this, fold your ribbing in half lengthwise and slip stitch between both layers to secure. Matching stitches, skip next row, slip stitch in next row, around. TAKE CARE TO LOOSELY SLIP STITCH! If you pull too tightly, you will not be able to work the next step!!
Leave a long length of yarn for sewing and finish off.
The next thing we need to do is ease the brim to your hat!
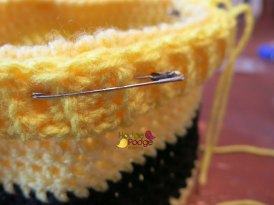
To make this work with as few tears as possible you will need a few safety pins. I use large sized pins because they are easier with all this yarn, but you can use smaller ones if that’s all you have lying around.
Flip your hat inside out and position your ribbing on the OUTSIDE with the slip stitches facing. Then carefully pin in place so that it’s even all the way around your hat.
Once you are happy with the placement, it’s time to start sewing. Thread a yarn needle with the leftover tail from your ribbing and begin whipstitching around the hat. DON’T PULL TOO TIGHTLY OR THE HAT WILL NOT FIT PROPERLY!!
When you’re done, flip it right-side out and enjoy!
Toasty Ears!
If it’s simpler for you to follow along to a video tutorial, then you’re in luck! Hit the play button below and you’ll be able to see everything I’ve just described above!
If you enjoyed this project don’t forget to click that LIKE button below and if you have the time I’d love to hear from you with a comment!! If you’ve tried this with one of your old hats and want to share a pic, I’d LOVE to see it! Come on over to the HodgePodge Crochet FACEBOOK PAGE to show off your stuff and don’t forget to hit that FOLLOW HODGEPODGE button in the side bar so you don’t miss out on more cool stuff!
Copyright :: All Rights Reserved
Title :: HodgePodge Crochet
Category :: Website
MCN :: WNUR5-G3DK9-QT83Z
All patterns found on this blog, with exception to those posted by featured crochet artists and those that link to other blogs, are property of HodgePodge Crochet and are registered and protected by copyright.
All written material (including patterns and photographs) may not be altered, reproduced, sold, or published in print or electronic form.
Permission is given to sell finished items from all patterns. A link back is appreciated but not necessary.