Tag Archives: Tutorial

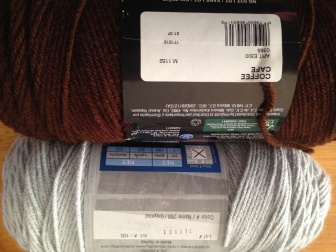
Crochet Know How: The Russian Join with Acrylic Yarn


www.HodgePodgeCrochet.wordpress.com The Russian Join

Lots of new crocheters eventually bump up against the problem of how to deal with a yarn knot. Either they find one (or several) in the center of a brand new skein of yarn or they run out of yarn before they run out of project!

The Russian join might seem scary but I promise, with practice and patience it will become one of your most useful tools in your crochet belt! Use it on all of your projects because not only is it more secure than a square knot (ever have a project unravel on you because of a knot that’s worked itself loose?!?), it’s also neater and pretty much invisible when done correctly!

If you liked this tutorial don’t forget to hit that like button below and don’t forget to mosey on over to the right of your screen to find the FOLLOW HODGEPODGE button so you don’t miss out on upcoming tips, freebies, and fun!

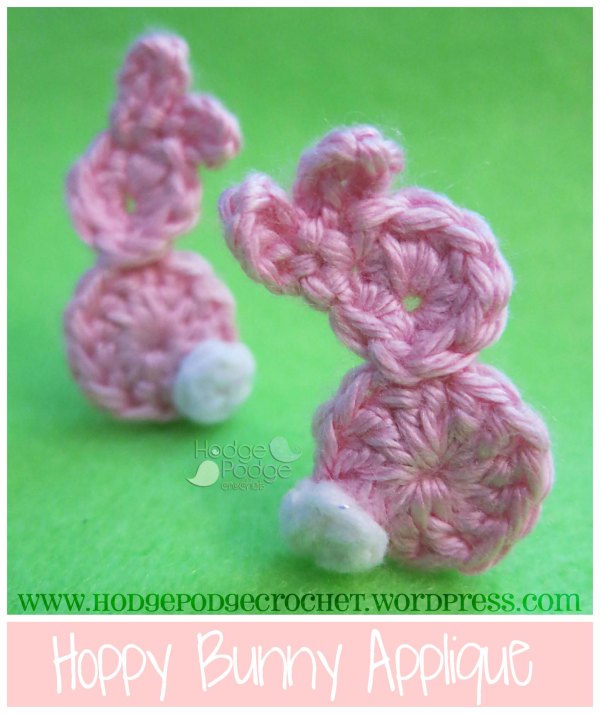
Hoppy Bunny Applique!


ADORABLE Hoppy Bunny Appliques have sprung to life just in time for spring! 

www.hodgepodgecrochet.wordpress.com :: Hoppy Bunny Applique :: FREE PATTERN!

I love this cute little bunny and you can find your FREE copy over in my Craftsy or Ravelry shops! The pattern comes complete with instructions on how to create a left OR right facing rabbit.

Use yours to embellish hats, slippers, scarves, sweaters, wristers (you can stitch these little cuties onto anything!) or get creative and create some super cute springtime jewelry that is sure to be a hit as quick class gifts or birthday party favors!

www.hodgepodgecrochet.wordpress.com :: Hoppy Bunny Applique :: FREE PATTERN!

www.hodgepodgecrochet.wordpress.com :: Hoppy Bunny Applique :: FREE PATTERN!

www.hodgepodgecrochet.wordpress.com :: Hoppy Bunny Applique :: FREE PATTERN!

Crochet Indian Cross Stitch


https://hodgepodgecrochet.wordpress.com/ Crochet Indian Cross Stitch

It’s no secret to any of my friends that my knitting skills are rudimentary at best but I LOVE the look of knit and secretly wish that I was bi-yarny.

So whenever I head on over to YouTube I like to check out complicated knit stitches and marvel at the delicate and intricate fabric that results–pretty much like magic–on the end of two sticks. Seriously…you need a hook people. 😉

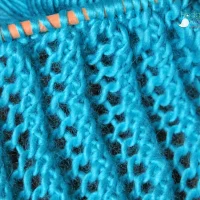
The last stitch I checked out–the Indian Cross Stitch demonstrated by New Stitch a Day–left me stunned!

It’s gorgeous, right?

But, if you are anything at all like me,  you kinda need those hooks on the end of your ‘knitting needle’ to get anything done!

That’s where I got to work using my yarn to recreate this gorgeousness in crochet form and before I knew it, the crochet version of the Indian Cross Stitch was born!

https://hodgepodgecrochet.wordpress.com/ Crochet Indian Cross Stitch

This stitch is NOT for the faint of heart but it is for the adventurous crocheter who would love to stick another crochet tool in their belt! It’s fun to work, teaches you a lot about how you personally work your yarn (if you’re a strangler it will let you know!), and forces you to rethink how you use those hooks that we all take for granted! (Trust me…us crocheters NEED a hook on the end of our sticks!!)

If you’d like to tackle a swatch on your own, you can head on over to any of my online shops and pick up a copy for free! My challenge to you is to work the stitch into something and then come share it with me. I’d love to see what you can come up with!!

Crochet Indian Cross Stitch Swatch in Craftsy

Crochet Indian Cross Stitch in Ravelry

Crocheter’s Spotlight: Open Skye Creations


Another BLOG takeover!!! This time, I’d like to introduce my very good friend April! She runs the amazing shop, Open Skye Creations and is a master at all things graphghan. I asked (okay… I BEGGED) for her to explain her process and break it down for the rest of us–and she said YES!!

Graphghans

From This

https://hodgepodgecrochet.wordpress.com/ Crocheters Spotlight: Open Skye Creations

To This!

https://hodgepodgecrochet.wordpress.com/ Crocheters Spotlight: Open Skye Creations

I get tons of questions on a regular basis about my graphs. About how to take a graph and turn it into a blanket or a pillow or a scarf. Let me tell you- it isn’t as hard as you think! Crochet by Numbers is complicated and can take a very long time. Don’t get me wrong, creating a graphghan can take months to complete. It all depends on your skill level, speed, and time capabilities to spend on working on it. But if you can single crochet and color change you can definitely do it! I’ve put this post together to give you some of my favorite hints and guidelines to completing your own! And if you’re a seasoned pro- you can see how I do mine.

Single Crochet, Half-double, Tunisian- it doesn’t really matter. The tips are still the same and hopefully the hints I provide will make sense to you!

To start it off- These are the MUST HAVES to completing a graphghan.

https://hodgepodgecrochet.wordpress.com/ Crocheters Spotlight: Open Skye Creations

First you have the hook. I recommend an “I” hook and medium tension while working up a graph. Second you have the graph itself; I always print mine out on multiple pages and tape them together so I don’t go blind while trying to read it. Third I have BOBBINS! I can’t stress enough how much time and energy these puppies have saved me. They help prevent and reduce tangling (nothing you do can eliminate it 100%) and they just make it easier to hold on to.  Fourth I have a pen, piece of paper, and a highlighter- note I put them as one item because they’re writing utensils and writing utensils are very important in any crochet project.

https://hodgepodgecrochet.wordpress.com/ Crocheters Spotlight: Open Skye Creations

And then you have the yarn itself. Every graph I sell I include a yarn usage estimator. Keep in mind that not all graphs will have this so make sure you always round up. Having the same lot and dye number is extremely important when working on any crochet project- but especially when you’re working up a graph. The last thing you want is a picture ruined by two conflicting shades of black or red. The picture above shows the lot and dye information in case you don’t know where to look for it. It is always on the yarn label itself!

Now here is where things change a little bit. I write out every line of a graph that I’m doing. BEFORE I WORK IT UP. This has multiple purposes. When you write it out, you get a feel for just how much work there is going to be. It also helps tell you how many bobbins you are going to need. Every time you do a color change, you should be changing your bobbins (By changing bobbins every time you prevent having a different color running through the color you’re currently working on and keeps the picture looking clean). It also lets you determine which direction you’re working on the graph.

When working on a graph I work from the bottom up. When I do my initial chain +1 (you always sc in the second chain from the hook when you’re working- like the chain 1 and turn scenario) I then work the next row from Right to left. That is my row 1. My row 2 is done from left to right, row 3 from right to left and so on. When you have the rows written out you can use an arrow or other measure to tell you which way to work it up. Now- if you are working it up in Tunisian stitch you are working it up reading from right to left on every row.

These are the most common things I encounter when working up a graph, and the questions that people ask when they get me one on one.

https://hodgepodgecrochet.wordpress.com/ Crocheters Spotlight: Open Skye Creations https://hodgepodgecrochet.wordpress.com/ Crocheters Spotlight: Open Skye Creations


People always post nice clean photos of their WIPS (work in progresses) but this is hardly the case. They are actually messy- but no one wants to admit that they have a tangled mess of yarn. Don’t worry- its normal! The picture on the left is a graph I worked on that was easy to keep clean and untangled. Note- the bobbins that are nice and orderly at the top!! The piece on the right is NOT clean. And it was done by someone who has done graphs for a long time. Don’t worry about the mess!! You can always fix it later.

I get asked a lot how I recommend doing color changes. The best way I can describe it is this. In the LAST SC of the first color you push your hook under the top two strands of yarn and yarn over with the first color; pull back through. Yarn over WITH THE NEW COLOR and complete the stitch. The videos I have a link to below should help with it if you need to see the walkthrough. It creates a complete stitch with the first color while allowing you to start your new stitches with the second color. *HELPFUL HINT* I always gently tug on the first color that I dropped to help reduce gaps and keep it from being too (loose) for lack of a better word. Don’t worry if you tug it a little too tight, it won’t mess up as long as you remember that stitch when coming back on the next row.

When you’re working a row and bring up the yarn from the previous row, if there is a long strand, crochet over it like you would crochet over your ends when doing a color change in a hat or an amigurumi. I have videos on my youtube page that explain it simply (and in a setting you’ll all know- my lap sitting on my plaid oversized chair!) http://www.youtube.com/user/canavanapril <- that’s my channel. Feel free to watch the videos and subscribe!

I know this sounds really bad, and tedious- and really a question that people wouldn’t think to ask- but here it is anyways. At the end of EVERY ROW you chain 1 and turn. If you don’t do this then you’ll end up with different row counts.

Find April at: www.openskyecreations.com or on facebook at: www.facebook.com/openskyecreations

https://hodgepodgecrochet.wordpress.com/ Crocheters Spotlight: Open Skye Creations

Baby Bootie Blocking


So, you FINALLY got around to making that perfect pair of baby booties!! Congratulations on your accomplishment! I seriously consider baby booties a right of passage for any crocheter because they test your skill set like nothing else in crochet will (except maybe mittens–but we’ll save that for another post).

In order to be successful with baby booties you not only have to make ONE absolutely perfect, but then you have to replicate that to make a SECOND shoe identical to the first. It’s not as simple as it sounds–trust me on that.

Sometimes you end up making that first shoe and things kinda go horribly wrong. Only, you don’t want to admit it to yourself (or anyone watching) so you plow on and end up with something like this:

https://hodgepodgecrochet.wordpress.com/ Baby Bootie Blocking

If your shoes look anything like these, (twisting, curling, and even if they aren’t exactly both the same length) you CAN fix them–it just takes a little time…and a couple of wet paper towels.

If you hunt around the internet to learn about what it means to ‘block’ your crochet, you’ll get a lot of people telling you all sorts of things–like what kind of yarn will block, the method that works best for each type of yarn, what sort of fancy pins to buy, rubberized mats you need…and on and on and on. But I’m not that kind of crocheter (and I’m guessing the majority of us are the same way). I’m the kind that enjoys a challenge and tries to find the short cuts (and the cheapest way to do things) in order to yield the same results.

I’ve read a lot of things about acrylic yarn and how it’s pointless to even try to block it because it never works. Since the bulk of my projects are done in 100% acrylic yarn (like the booties above) most of my things never need help being blocked because acrylic yarn does a pretty good job of keeping its shape if you crochet it correctly.

But what happens in the case of booties is that they always need a little help (even if you are a world-class bootie crocheter–your booties ALWAYS need shaping. Don’t be fooled by those amazing photos plastered all over those patterns you love. Every shoe has been carefully shaped to get it to look the way it does and what you don’t see is the process that has been used to get that shoe to look the way it does in the pattern (cause if they snap a pic of it the way it looks right off your hook–you’d never buy the pattern!)

This is my process of blocking a shoe to make it look pattern photo-shoot ready!

Materials you’ll need are:

  • One pair of baby booties
  • Paper towels–any brand (The larger the bootie, the more paper towels you’ll need. For my infant pair I used two full squares for each shoe.)
  • Water
  • Time (at least 24 hours. If you leave these longer they will hold their shape better.)

The Process:

https://hodgepodgecrochet.wordpress.com/ Baby Bootie Blocking

Begin by deciding how many paper towels you’ll need for each shoe. Too many and they will stretch out your shoe; too few and when you pull them out your shoe won’t be blocked correctly and will still have problems–and then you might come back telling me it didn’t work. 😉

For my shoes I’ve used two full squares in each. That was enough to fill my shoe properly without overfilling it and stretching it out. Don’t worry too much about guessing correctly because you can always add in an extra sheet or take a sheet out later. 

The next thing you’ll need to do is to wet the sheets thoroughly. I like to saturate mine in lukewarm water. Make sure there aren’t any dry spots left–they should be sopping wet–on your paper towels.

Ring them out so that they are wet but not dripping and then give them a tug so they are relatively flat again.

https://hodgepodgecrochet.wordpress.com/ Baby Bootie Blocking

Next comes the fun part! Take one of your paper towels and fold in half. Insert the fold into the toe of the shoe and start shaping. The more time you take with this now, the better your shoe will look when you pull the paper towel back out later.

Once you have your toe shaped, stuff the rest of the paper towel into the rest of the shoe and shape the heel and sides. Once you are happy with the shape, repeat with the other shoe.

https://hodgepodgecrochet.wordpress.com/ Baby Bootie Blocking

https://hodgepodgecrochet.wordpress.com/ Baby Bootie Blocking

Now the only thing left to do is to leave your shoes to sit. They should remain untouched until your paper towels are BONE dry. You don’t want to remove them if there is any moisture remaining at all. That could take anywhere from 24 to 48 hours depending on  your climate. Trust me on this–it’s well worth the wait! Especially if your booties needed help to begin with.

Once you’ve waited until your paper towels are completely dry, it’s safe to slip them out and revel in your perfect pair of baby booties!

By the way–NO camera tricks have been done here to enhance  the shape of these booties. This photo was taken directly after sliding out the paper towels in my booties.

https://hodgepodgecrochet.wordpress.com/ Baby Bootie Blocking

You can see that however I shaped them is exactly how they have remained after being blocked. (That is why the shaping part of this project is SO important).

Now that the process of blocking is finished, your shoes are ready to gift, photograph, sell, or put on your baby!

Quick tip: If you wash your booties, work the blocking process with DRY paper towels when they come out of the washer to keep the shape!

Blocking your baby shoes is a great trick to use when you tackle them and aren’t exactly happy with the finished results–or even if you are but want to get a dedicated right and left shoe!

If you’d like a simple shoe to get you started, I hope you’ll consider my Basic Baby Shoes pattern (This is the pattern I’ve used with the shoes shown in the photos throughout this tutorial to demonstrate this blocking technique with you).

If you’ve successfully used this tip with your shoes, I’d love to see them! Please head on over to my facebook page to share your pics with me!

https://hodgepodgecrochet.wordpress.com/ Baby Bootie Blocking