
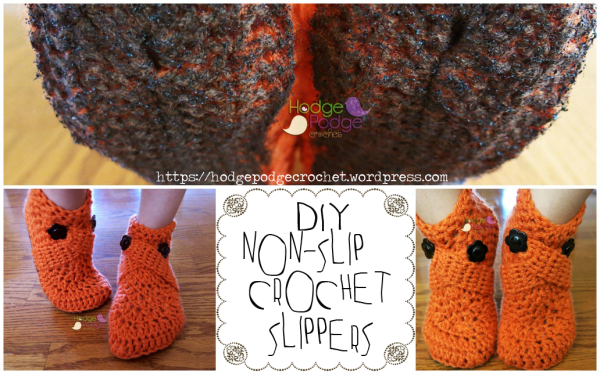
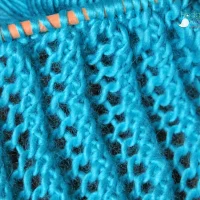
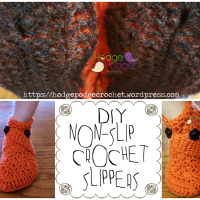
I get asked a lot about crochet booties. I think it’s probably the number one thing that most crocheters silently drool over but don’t really tend to tackle until they have their basic crochet skill set nailed down. (You kinda have to make two identical shoes!!)
However, with such AMAZING slipper patterns by Mamachee * Crochet makes me happy! and Two Girls Patterns, most of us generally get to that point where you have FINALLY mastered your own pair only to find out what the pattern doesn’t mention is that, if you’re not careful, you’ll probably break your neck while using them as yarn tends to slide when covering feet….
So what can you do to save all that heartache from having two perfect slippers that you are too afraid to use? You get your craft on in the hardware section!
Let me introduce you to Plasti-Dip! For those of you who have no idea what this is, it’s pretty much rubber in an aerosol can!

This little can can transform dangerous crochet slippers into safe, skid-proof, ones in little less than a day. How? Glad you asked!
The first step is to make sure you’ve got a nice day outside because you absolutely can not spray this stuff inside your house. It’s toxic and can cause some seriously bad stuff if you spray inside in a confined area. So dedicate some outside space to spray and leave your slippers between coats.
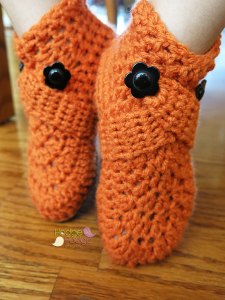
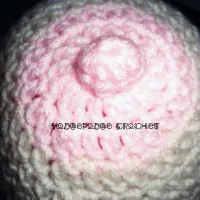
The next thing you will need is a pair of slippers! I chose to modify my own Child Slipper pattern but you can use this on any slipper at all and the results will always be the same.

 With your slippers in hand, cut out some cardboard insoles to protect the inside once you begin to spray on the rubber coating.
Insert the cardboard soles into your slippers and then carefully tape around the outside with some masking tape in order to keep the rubber coating confined to just the bottom of your slipper.

Once you are happy with it, it’s time to start spraying! This part can get messy so I recommend laying down some newspaper or an old cardboard box so that you don’t get rubber everywhere. Quick tip: if you do accidentally spray rubber onto something you didn’t want to get coated, you can peel it off once it’s dried completely, so don’t panic!
All that’s left to do is spray! Give the bottom of each slipper a nice even coating. Don’t go crazy because you will need to build up three or four coats in order to make this work. When you’re done, leave it to dry for about an hour and then go back and spray again. Repeat until you’ve gotten all of your coats done. If you are going to use these slippers a lot, use more coats. If they will be worn sporadically, use less coats. I wouldn’t go any less than three coats no matter how often the slippers will be used so keep that in mind when planning your attack!

One coat of Plasti-Dip applied.

Three coats of Plasti-Dip applied.
Once you let your last coat dry completely, you’re ready to use your new slippers and NOT break your head because of slippery yarn. The slippers are also washer safe but make sure you follow the laundering requirements of the yarn you are using!! Personally, I would skip the dryer and only line dry these.
Plasti-Dip also comes in red and CLEAR!! You don’t have to purchase it only in black but I kinda like the idea of a black sole because if your house is anything like mine…the soles will turn this color eventually.

You can pick up a can of Plasti-Dip over in Amazon and one can will last you through many slippers!

Tagged: booties, Crochet, crochet slippers, HodgePodge Crochet, non-skid, PLASTI DIP, rubber coating, Slipper


Great idea for my 92 year old mom, now that she can no longer wear shoes. She wears slippers all the time that my sister makes. I have been looking for something to help her when getting up from slipping. Thank you for this idea.
LikeLike
Excellent!
LikeLike
[…] DIY Non-Slip Crochet Slippers Tutorial from Hodgepodge Crochet https://hodgepodgecrochet.wordpress.com/2014/12/09/diy-non-slip-crochet-slippers/ […]
LikeLike
Brilliant idea – many thanks for bringing it to our attention 🙂
LikeLike
And I can’t spell…
AwesomE!
LikeLike
I get that way all the time 😉 So glad you enjoyed this one!
LikeLike
Awesom!
LikeLike