
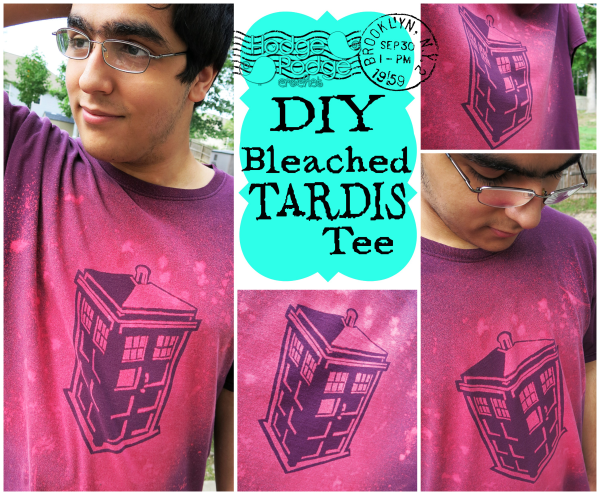
Okay…I admit I’ve always wanted my very own TARDIS… Who wouldn’t?!? As long as it comes with a Time Lord, I’m set. 🙂
Since I am highly doubtful that my TARDIS dream will ever be a reality (anyone out there who knows David Tennant or Matt Smith and is willing to pull some strings would earn my eternal gratitude!), a girl has to settle for Plan B. My Plan B is to put the TARDIS on everything I possibly can.
Today, that thing is a t-shirt!
I had a ball painting the TARDIS on my DIY Handbag, but in order to get acrylic paint to behave better (I admit, I’ve never thought about washing a handbag before…) you need to add some acrylic medium when painting on clothing so that your fabric stays soft and lasts through more washes. Note: You don’t technically NEED to add it–acrylic paint won’t wash out–but it helps keep the color vibrant and also helps your fabric still feel like fabric and not get too stiff.
So, instead of painting, I decided to bleach.
Bleaching can be a lot of fun (and is certainly less expensive) but whenever you tackle a project that involves color, the first thing you need to think about is…well, the color!
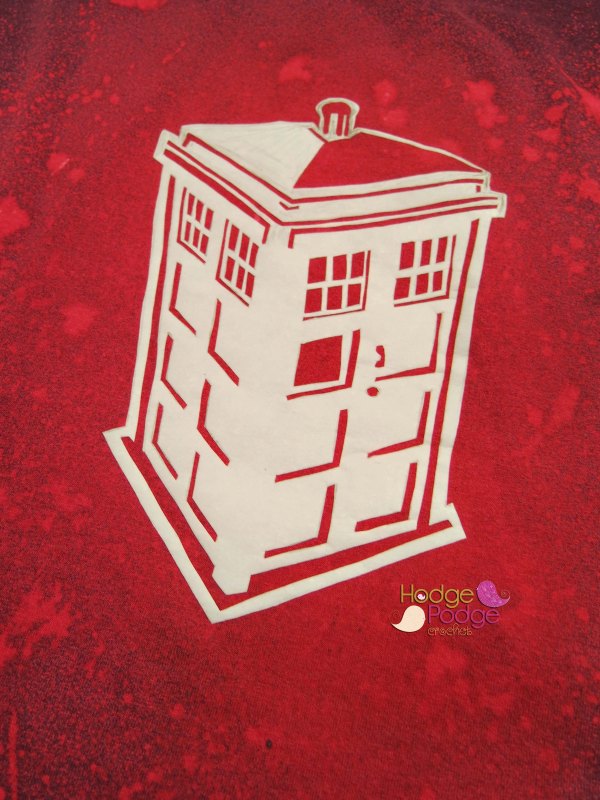
When you paint, you can either paint on the darker contrast or opt to paint lighter tones and cause the fabric under to contrast.
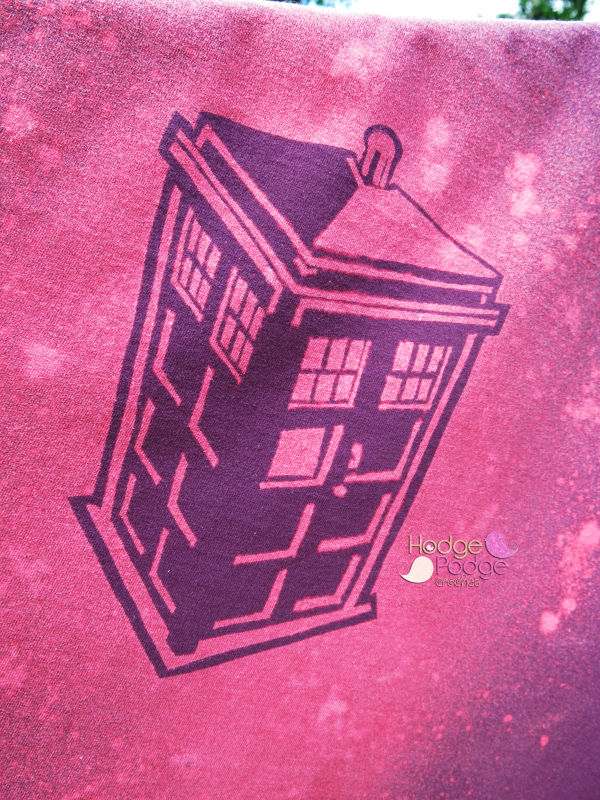
When you bleach, whatever the bleach touches will automatically lighten. So technically, whatever is covered by the stencil will be what contrasts.
I’ll show you an example of what I mean:
TARDIS stencil on fabric with paint (Notice how the black paint instantly creates contrast, causing the fabric to pop):

TARDIS stencil with bleach (Notice how the bleach lightens the fabric, creating contrast with the original color of the t-shirt, causing it to pop):
Whatever way you choose to do it, I promise you’ll have a ton of fun getting it done.
So what do you need to create your own bleach tee masterpiece? You probably already have everything on-hand!
- The first thing you will need is a t-shirt. It doesn’t have to be the most fancy thing on the planet or even brand new. (Got an old oil-stained or paint-stained one you’ve been hanging on to? This project is perfect for it!!)
- Freezer paper. You will need this to create your stencil and it’s absolutely critical to getting a good bleached tee.
- A printer.
- A sharp X-acto knife. Scissors won’t work unless you are doing something with relatively straight edges and no inside cut-work.
- An iron.
- Bleach.
- A glass measuring cup.
- A spray bottle.
- A rag you don’t mind getting bleached.
- Rubber gloves.
- Cardboard and aluminum foil or plastic garbage bags and a large flat surface.
- Water.
- White vinegar.
- Washing machine and dryer.
- A nice day to work outdoors.
The process:
The first thing you need to do is decide what to put onto your shirt. The internet is full of interesting graphics that would work well when bleaching a tee. Just pull up Google and type in silhouette followed by whatever it is you are interested in finding an image of and you won’t be disappointed.
If you’d rather tackle the TARDIS above, you can grab a copy of my template right here: HodgePodge Crochet DIY Bleached TARDIS Tee.
Once you have your image, the next thing you need to do is print it and then layer it under your freezer paper and trace over it. You will be cutting out everything that is white and leaving everything that is black. TAKE YOUR TIME!! Spending extra time now to make it right will pay off later!

I recommend writing on whatever part of the stencil will need to be removed to make the whole process simpler.


Now that your template is all trimmed, it’s time to iron it onto your tee. MAKE SURE you are ironing shiny side down. The shiny side is the side that will adhere to your shirt and you don’t want that stuck to your iron!
Use a hot iron with no steam and once you have the paper good and stuck down, leave your shirt to cool off for at least 30 minutes. It’s not mandatory but I find that I get a better resist when I let the fibers cool off from the heat of the iron.
While you are waiting, mix up your bleach solution. I do NOT recommend using straight bleach for this project. It’s way too harsh for the fabric and will more than likely eat through the t-shirt before you have a chance to peel back your stencil. Instead, measure out a 50/50 ratio of bleach to water and add it to a spray bottle. Make sure that you label the bottle so there aren’t any accidents later!!
When you are ready, prepare your cardboard by covering it in aluminum foil. (You can opt to line your shirt with garbage bags instead.) Once it’s covered, slide it inside your shirt. This will be used as a barricade so that the bleach only stays on the front of the shirt. Feel free to skip this part if you plan to bleach the back as well as the front.
Now is a good time to take your work outdoors. Bleach is not fun to breathe in and can be dangerous if inhaled. Working outside provides great ventilation as well as great lighting! If you are particularly sensitive, wear a respirator as well.
All that’s left is to put on your gloves, grab your rag, and start spraying your bleach mixture!
BUT WAIT!! DON’T GO CRAZY!!!
Lightly spray your design, blot up the excess asap, and then force yourself to wait!! You won’t see anything happen at first but give it a few minutes for the bleach to work its magic. You will notice the fabric you’ve sprayed to begin lighten. The result is more dramatic with darker colored tees.
Quick tip: Don’t let your bleach pool anywhere and try to keep your paper as dry as possible. Also, BLOT!! Don’t wipe. Wiping might push bleach under your stencil and ruin your design.
Keep layering on bleach as you go, waiting between sprays and blotting up excess bleach, until you get the desired effect.

Once you are happy with your design, leave the shirt to sit for a few minutes (it should be barely damp, not soaking) and then carefully pull off the stencil. Make sure your hands are clean (no bleach!) otherwise you may end up bleaching an area that you didn’t want bleached!
Now that you’re all done with the bleaching, it’s time to deactivate it and stop the process!! The first thing to do is immediately throw that shirt into some water (running water is awesome!!) and rinse and rinse and rinse!

Make sure you really rinse well because the next step involves vinegar and you don’t want to mix bleach with vinegar!! That’s bad..
Once your shirt is totally rinsed–several times with lots of fresh water–it’s time to deactivate whatever bleach might be left with some straight white vinegar.
Throw your shirt into a bowl and then pour some vinegar over it and squish it through. Then leave it to sit outside for 1-3 hours to do its work.

After it’s done soaking, ring it out and rinse it one last time with some fresh water and then launder as usual!
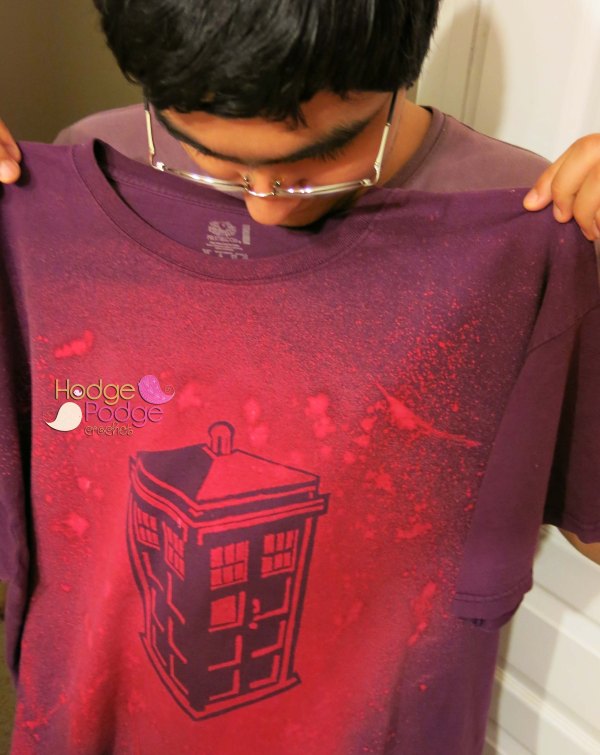
The result is pretty spectacular!!

FAQ’s!!
The following are some of the questions I’ve gotten since posting this tutorial that I thought would be best shared right here!
Q. Do I need to prewash the shirts?
A. I recommend prewashing to remove sizing because if your shirt shrinks weird on you, your design will shrink weird and all that work is gone. Also, sometimes sizing will resist bleach and you won’t end up with the result you expect.
Q. Can I put different color shirts into the vinegar bath together or do I need a separate bowl for each?
A. You can put all shirts together in the same bowl as long as you are 100% positive you’ve rinsed all of them REALLY WELL before putting them into the vinegar. (Mixing straight bleach and vinegar will produce toxic fumes so it is **really important** to rinse your shirts well before dunking them into vinegar.) Vinegar won’t cause colors to run.
Q. I’ll be working in full sunlight, any special precautions I need to take?
A. Working out in the daylight (on a hot day) is best for making these shirts because it encourages faster dry times between mists of bleach. It’s also encouraged to do these outdoors because bleach fumes aren’t good for you. If working inside, make sure you have adequate cross ventilation!!
Q. My bleach is lemon scented, will that affect the process?
A. The scent of the bleach will not affect the end result.
Q. Anything else I need to know?
A. Yes!
- It is TEMPTING to dump as much bleach onto your shirts as fast as possible, but you must resist the urge!! Putting on too much bleach too fast will soak your shirt. The result will be bleeding under your template (especially if you have a lot of thin areas on your stencil) and might ruin your design.
- After some experimenting, I’ve learned that bleach will not work on most synthetic fabrics. What you end up getting is this almost ghost print (if anything at all) which could be cool if that’s the look you’re going for. For an awesome bleach shirt you will need natural fabrics. The good news is that even the cheap t-shirts at WalMart (where I got all of mine) are a natural fiber blend and they will work just fine. 100% cotton will also work well, HOWEVER, bleach really weakens cotton so adjust your bleach ratio so there is more water than bleach and use sparingly. If you get big, wet drips of bleach on 100% cotton, they will quickly develop into holes in the material.
- If you use cardboard and skip the step of covering it with aluminum, be warned! Cardboard will soak up your bleach and become a nightmare (especially if you are heavy handed with the spraying). For the best results with your stencil, make sure your cardboard is either wrapped in plastic or covered in aluminum foil.
- Don’t wear anything you would cry to get bleach on when tackling these shirts!!
- Different color shirts WILL bleach differently. I’ve had unexpected results with quite a few shirts I’ve done. What I’ve found is that purple shirts bleach to green OR pink tones. Green shirts lighten to yellow or lime.
- The darker the shirt, the better the result with the least amount of bleach. Black and brown have been my two most successful bleached result.
- The lighter the shirt, the more bleach you will need to lighten the fabric around your stencil.
- Only mix small batches of bleach at a time and empty the leftovers (don’t store it). If you store leftover bleach it could weaken your spray bottle and end up a giant mess on you.
- ANY cheap spray bottle will work for this project. If you don’t have a spray bottle you can use a kitchen sponge dipped into your bleach ratio and squeezed out so that it’s damp but not dripping. GENTLY dab onto your shirt and go slow. Make sure you are wearing really good gloves if you decide to go with the sponge and when you are finished, rinse the gloves with water, dip into vinegar, and rinse again before removing them.
- When you are all done with your final shirt rinse and ready to wash, throw them into your machine without any other clothing to reduce the risk of accidents!!
If you make a tee, I’d love to see it!! The following is a HodgePodge Pic Gallery filled with contributions from some amazingly crafty Podgers!

If you try one of your own, head on over to facebook and share it with me! I’d love to see your creations!

Tagged: Acrylic paint, Bleached t-shirt, Crafts, DIY, Doctor Who, fabric, HodgePodge Crochet, TARDIS, the TARDIS


[…] paper with my cricut machine. This year (2015) I found this beautiful tardis stencil that hodgepodgecrochet posted. The program I used to cut my own image on the cricut machine is no longer supported, so I […]
LikeLike
These are the coolest looking bleach art shirts I’ve seen! You did a great job & you’re tutorial is great. Thank you! Is there any chance the stencil will be reusable to do more than one shirt or do you have to make a new one for each shirt? Thanks again!
LikeLike
Hey Toni! Thanks so much for your comment! Unfortunately, these are a one-and-done type of deal. When you work with the paper and iron it on, the stick is gone when you pull it back off (you’ll see what I mean when you try it). If you wanted something a little more permanent you could try cutting this out using mylar stencil material. To make it tacky so that it sticks to your shirt you could try something like Easy-Tack.
I can’t say for sure how your project will turn out, and the cost of materials is greater, but you might end up with something that you can use to mass-produce and sell!
LikeLike
Thanks for this awesome tutorial and the stencil! I made two Doctor Who shirts for my brother’s birthday. You can see my pics on my blog, I also linked back to your blog because of your great tutorial. Thanks again, I had a blast making the shirts!
LikeLike
[…] are several nerdy obsessions I have. (You’ve probably all noticed the Doctor Who thing by now…) But I also LOVE anything Harry Potter and I have a passion for all things […]
LikeLike
[…] I have a weakness for The Doctor–he’s been lovingly recreated in both purses and tees which I use constantly–so this yarn holds a special place in my […]
LikeLike
Super cute!!
LikeLike
Reblogged this on grammasgifts and commented:
what a great idea for the upcoming holidays
LikeLike
Reblogged this on From Home Crochet and commented:
Fantastic Tutorial by Tanya of Hodge Podge Crochet!
LikeLike
Reblogged this on and commented:
See, I told you Hodgepodge was amazing! 🙂
LikeLike
Fun!
LikeLike